In the realm of web development, crafting a secure and user-friendly login registration form is a fundamental skill. In this commentary, we’ll delve into the provided HTML, CSS, and JavaScript code that creates a student login registration system, highlighting key aspects of the code and offering insights into its functionality.

HTML Structure:
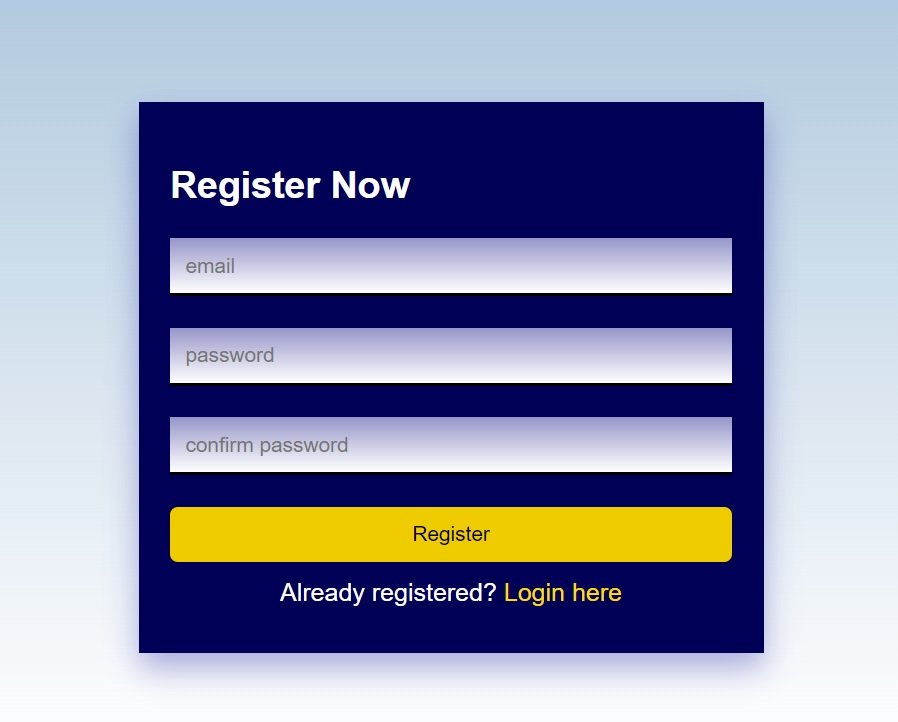
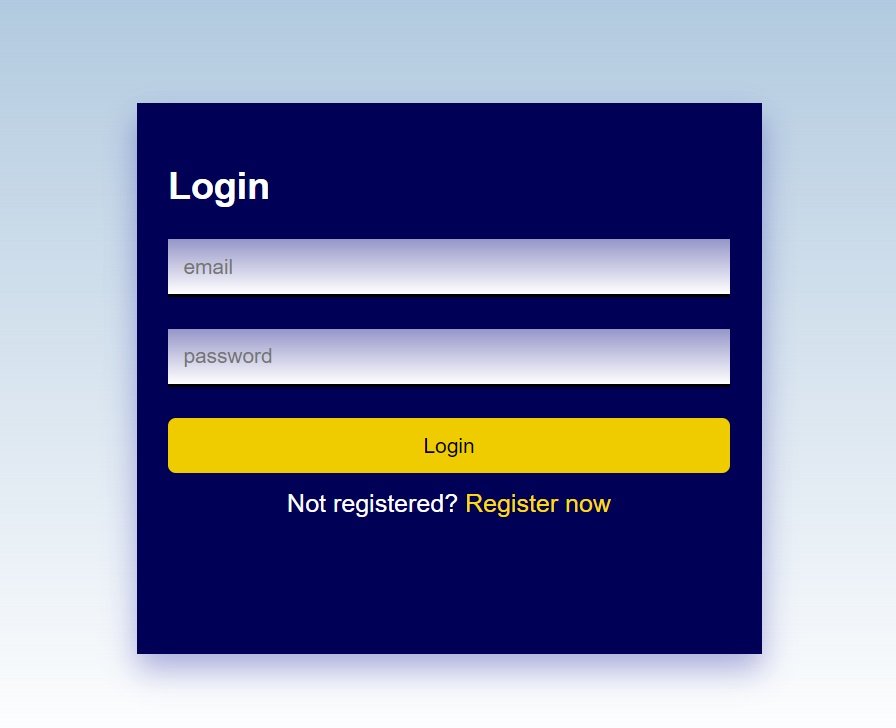
The HTML structure defines a clean and organized layout within a container. Two sections are present: one for user registration and another for login. Each section includes input fields for email and password, with the registration form also featuring a confirm password field. The interface is intuitive, allowing users to seamlessly navigate between the registration and login forms.
<!-- The main container holding both registration and login forms -->
<div class="container">

  <!-- Registration Form Section -->
  <div class="registration-form">
    <h2>Register Now</h2>
    <!-- Form for user registration -->
    <div class="form">
      <input type="text" placeholder="email"> <!-- Email input field -->
      <input type="text" placeholder="password"> <!-- Password input field -->
      <input type="text" placeholder="confirm password"> <!-- Confirm password input field -->
      <button onclick="registerUser()">Register</button> <!-- Register button -->
    </div>
    <!-- Footer with a link to switch to the login form -->
    <div class="footer"> Already registered? <a href="#" data-btn-type="login">Login here</a></div>
  </div>

  <!-- Login Form Section -->
  <div class="login-form">
    <h2>Login</h2>
    <!-- Form for user login -->
    <div class="form">
      <input type="text" placeholder="email"> <!-- Email input field -->
      <input type="text" placeholder="password"> <!-- Password input field -->
      <button onclick="loginUser()"> Login</button> <!-- Login button -->
    </div>
    <!-- Footer with a link to switch to the registration form -->
    <div class="footer"> Not registered? <a href="#" data-btn-type="register" >Register now</a></div>
  </div>
</div>
Explanation:
- The code defines a container with two sections:
registration-formandlogin-form. - Each form has input fields for email and password, and the registration form includes a confirm password field.
- Buttons trigger the
registerUser()andloginUser()functions for registration and login, respectively. - The footer provides links to switch between the registration and login forms based on the
data-btn-typeattribute.
CSS Styling
The CSS code is designed to enhance the visual appeal of the forms. It includes styling for a responsive and user-friendly interface. The color scheme, transitions, and layout contribute to an engaging user experience.
/* Global styling for all elements */
* {
  box-sizing: border-box;
  transition: all 0.3s ease-in-out;
  font-family: arial;
}

/* Styling for the body */
body {
  display: grid;
  place-content: center;
  height: 100vh;
  background:linear-gradient(rgba(0,80,150,0.3),white);
}

/* Styling for the main container */
.container {
  box-shadow: 0px 10px 20px rgba(0, 0, 150, 0.3);
  position: relative;
  width: 80%;
  min-width: 400px;
  color: #fff;
  overflow: hidden;
}

/* Styling for both registration and login forms */
.registration-form, .login-form {
  padding: 20px;
  background: #005;
}

/* Styling for form elements */
.form {
  display: grid;
  gap: 20px;
}

/* Styling for the login form (initially positioned off-screen) */
.login-form {
  position: absolute;
  top: 0px;
  left: 0px;
  width: 100%;
  height: 100%;
  left: -100%;
}

/* Styling for input fields and buttons */
input, button {
  padding: 10px 10px;
  border: none;
  outline: none;
}

/* Styling for input fields */
input {
  border-bottom: 2px solid black;
  background:linear-gradient(rgba(150,150,200,1),white);

}

/* Styling for buttons */
button {
  background: #ec0;
  color: #000;
  border-radius: 5px;
}

/* Styling for button hover effect */
button:hover {
  background: #fd0;
}

/* Styling for the footer */
.footer {
  padding: 10px;
  text-align: center;
}

/* Styling for footer links */
.footer a {
  color: #fd0;
  text-decoration: none;
}
Explanation:
- Basic styling is applied using CSS to create a visually appealing and responsive design.
- The
containerclass sets the overall appearance with a shadow and limited width. - Different styles are defined for the registration and login forms, including input fields and buttons.
- The color scheme provides a contrast between the forms and enhances readability.
- The transition property is used for smooth visual effects.
JavaScript Functionality
The JavaScript code handles user interactions, registration, and login processes. Local storage is utilized to persist user data across browser sessions. The code also includes functions for switching between the registration and login forms seamlessly.
// Array to store user data
let users = [];

// Retrieve previously saved user details from localStorage
if (localStorage.getItem("users") != null && localStorage.getItem("users") != undefined) {
  users = JSON.parse(localStorage.getItem("users"));
}

// Event listener for clicks on footer links
let footerLinks = $(".footer a");
footerLinks.click((event) => {
  // Determine which form to show based on the clicked link
  let showFormType = $(event.target).attr("data-btn-type");
  if (showFormType == "login") {
    console.log("Show Login form");
    showLoginForm();
  } else if (showFormType == "register") {
    console.log("Show register form");
    showRegistrationForm();
  }
});

// Function to show the login form
function showLoginForm() {
  $(".login-form").css({ left: "0%" });
}

// Function to show the registration form
function showRegistrationForm() {
  $(".login-form").css({ left: "-100%" });
}

// Function to register a new user
function registerUser() {
  let inputField = $(".registration-form input");
  let email = inputField[0].value;
  let password = inputField[1].value;
  let confirmPassword = inputField[2].value;

  // Validate user input and register the user
  if (email.length > 5 && password.length > 5 && password === confirmPassword) {
    users.push({ email: email, password: password });
    localStorage.setItem("users", JSON.stringify(users));
    showLoginForm();
  }
}

// Function to login an existing user
function loginUser() {
  let inputField = $(".login-form input");
  let email = inputField[0].value;
  let password = inputField[1].value;

  // Check if the user exists and display appropriate message
  if (isUserExist(email, password)) {
    alert("Welcome back " + email + "!");
  } else {
    alert("User not found!");
  }
}

// Function to check if a user with given credentials exists
function isUserExist(email, password) {
  let userExist = false;
  users.forEach((user, index) => {
    if (user.email.trim() === email.trim() && user.password.trim() === password.trim()) {
      userExist = true;
    }
  });
  return userExist;
}
Explanation:
- The script starts by initializing an empty
usersarray to store user data. - It retrieves previously saved user details from
localStorageand populates theusersarray. - Event listeners are set up to handle clicks on the footer links, triggering functions to show the respective forms.
- Functions
showLoginForm()andshowRegistrationForm()control the display of the login and registration forms. - The
registerUser()function captures user input, validates it, adds the user to the array, and stores the data inlocalStorage. - The
loginUser()function checks if a user exists based on the entered credentials and displays an appropriate message.
Conclusion
As we conclude this tutorial, you should have a fully functional student login registration system integrated into your WordPress site. Feel free to explore further customization and security enhancements to meet the specific needs of your application.
By following this guide, you’ll have a practical understanding of creating login systems.
Happy coding!